Perforce login and setup:
Basic information to set up you Perforce Client and connect to the class'
server.
- Step 1: Download Perforce documentation
http://www.perforce.com/perforce/technical.html
- Step 2: Download and install Perforce Visual Client P4V
for windows
http://www.perforce.com/downloads/Perforce/Customer
- Download and install the appropriate version for your OS
(32bit or 64bit) IP and Port of the server:
- IP: 140.192.39.61 PORT: 1666
- Follow the instructions from Getting Started on how to setup the
P4V. Your Depot is called //berthiaume2017winter_gam374/
- Step 3: Login and passwords:
- Username: Campus connect ID
- Password: Your initial password is “doggy” (lower case) or previous password
if you had a previous perforce account
with this username
- To change your password (and you should!)
- From the top menu, go to Connection/Change Password
- If you lose your password, send an email to
ekeenan2@cdm.depaul.edu
- Set proper email:
- From the top menu, go to Connection/Edit Current User:
- Reset your email to the correct one
- Update your full name
- Step 4: Watch the other instructional movies from the
Perforce website.
- Step 6: Setup
- After logging onto perforce and setting up a workspace
- Do the following modifications to make the perforce
environment work better
- Perforce(1) - Modify your workspace please
Edit your workspace, go to the advanced tab
Especially the revert unchanged files

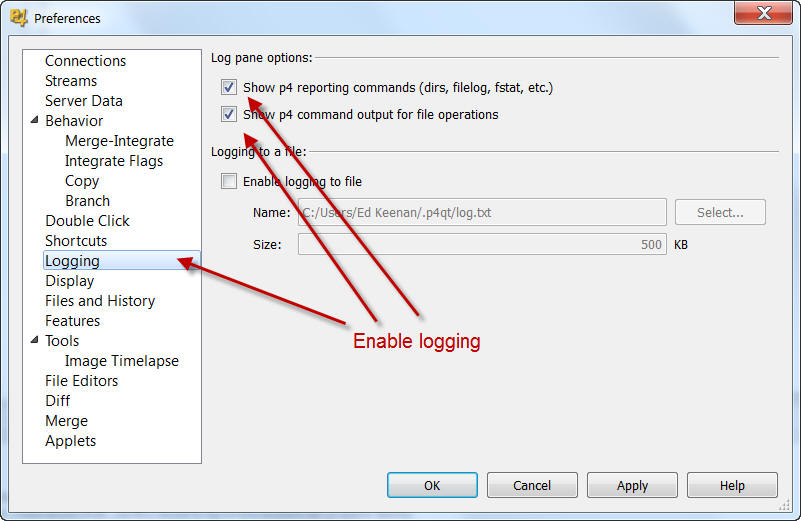
- Perforce(2) - Enable logging
- Go to Edit tab, choose preferences

- Step 7: Read the perforce papers from the Perforce website (perforce.com).
- Seriously, please read them

